This is the story of attempts, failures and the tricks I have picked up along the way.
One of my least favorite projects are window treatments….of any kind. I lean toward very unfussy panel curtains and blinds for privacy. Even though that is a simple fix for most spaces I somehow always get myself in way over my head when it comes to dressing up our windows. Bob Villa always says, “Measure twice, cut once”. Well, even with that mantra repeating in my mind throughout the whole process I never seem to get the measurements right. After many failed attempts over the years I started putting up the curtain rods and measuring from there before cutting any yardage. I also learned to iron every seam as I go and place the curtains before pinning the hems, etc. I know there are other and probably more “professional” ways to prettify windows, but this is how I managed to pull curtains together for both my son’s Big Boy Room and my daughter’s nursery.
Okay, so I admitted I do not enjoy making window treatments, but I will say my favorite way to approach this kind of project is with a ready made panel. Hee! I know that sounds like cheating, but I have yet to live in a home where inexpensive store bought panels actually work. Even in our last space, the 1960’s rancher, curtain panels off the rack were too short if I wanted to hang them properly. Properly meaning, high and wide to enhance the smallish windows. The first example is from my son’s room, which has symmetrical window spacing and allowed for a high and wide approach. However, the panels still needed something along the edges and bottom to make them fit the space, hence my need to “make” curtains for this room.
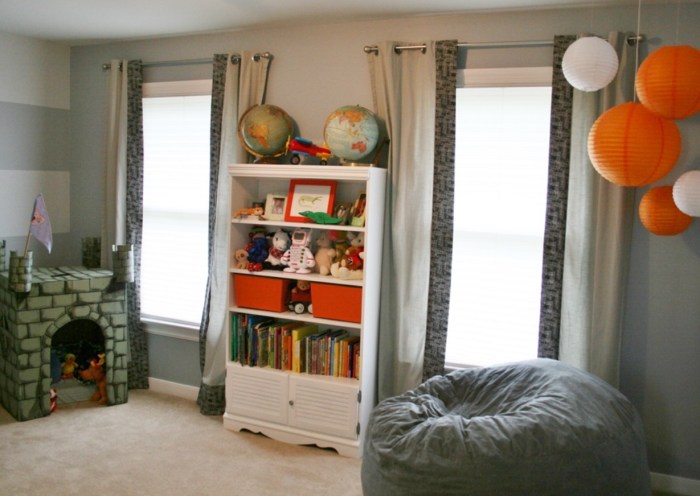
The Big Boy’s Room
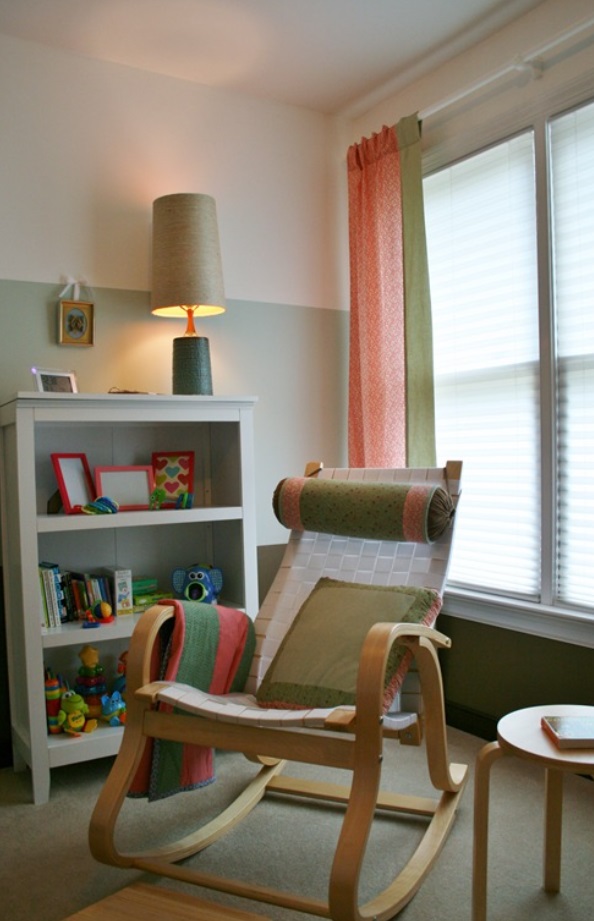
My Daughter’s Nursery
Both of these rooms have regular height ceilings, but I chose to hang the panels as high and as wide as possible without things looking off kilter. The panels in my son’s room are made from one set of store bought curtains that I cut in half and added a border to for interest, bulk and to create the correct length. In my daughter’s nursery I used the same technique of adding a border to simple panels, but did so from scratch this time. I just happened to have some fabric that was from the same line I used to cover the pillows on the rocker, so it worked out. I include my daughter’s nursery in this portion because the fabric I found in storage was essentially like the curtain panel fabric I found at a thrift store and used in my son’s room. Simple, straight and nearly the correct length. So, the process was pretty much the same.
In my dining room hang, probably my favorite curtains in the whole house. I get the most compliments on these too.

Curtain Photo and How-to Info Via
Click the link above for more details, but these started life as extra long table clothes. Again, another of my favorite ways to “make” curtains. I added faux wooden slat blinds for the actual privacy since these are only skinny side panels. I keep thinking that one of these days I will add a border to give them a bit more heft, but that is still way at the bottom of the To-Do list.
In another project I took a hint from my use of tablecloths and employed kitchen towels. I had fun with this one by going with a deconstructed look to make them work in the space.

These were another example of making due in an area that was otherwise way at the bottom of my “Remodel: To-Do List”. I have a more recent update coming to show how I dealt with that room after a spruce up.
So, tablecloths cut in half and store bought panels with added edges and hems, deconstructed kitchen towels all seem to be the easiest way to get it done on a dime and end up with a pretty nice look. I am still working through several rooms and will post more about how I tackled those in the future.
How have you been making your windows look better?
Thanks for stopping by!
Erika

